Stop waking the house: why robot vacuums and smart lighting clash — and how to fix it
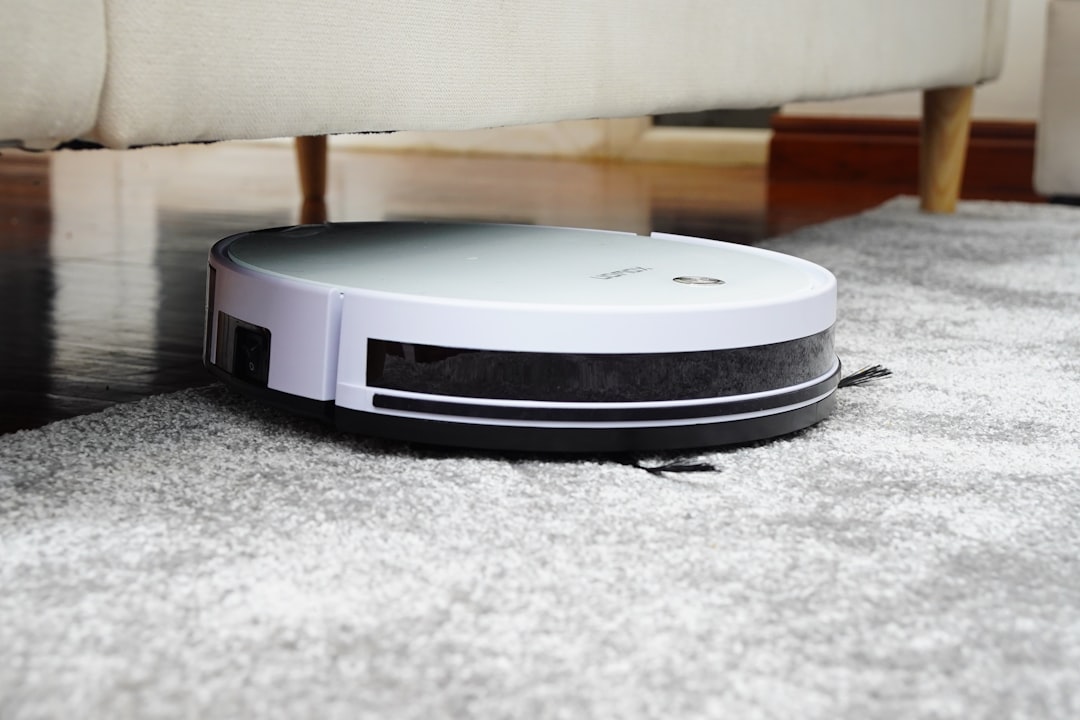
Hook: You schedule your robot vacuum for 1:00 AM to clean while everyone sleeps — and your hallway lamps flood full brightness because the vacuum’s movement triggers motion sensors. Or the opposite: the lights you rely on to see the charging dock never come on because the cleaning routine overlaps with a night-mode automation. These are not quirky one-off bugs. They’re timing conflicts, sensor cross-talk, and automation logic flaws that frustrate homeowners, renters, and property managers in 2026.
The big picture in 2026: why these conflicts are more common — and easier to fix
In late 2025 and early 2026 the smart home landscape matured in two important ways that affect reliability:
- More capable robot vacuums: mainstream models now include advanced SLAM, room zoning, and local APIs. They report granular events (zone start/finish, docking, error codes) you can use in automations — but that also increases event noise.
- Stronger integration standards: Matter and improved local bridges means more devices communicate directly on the LAN, reducing cloud latency but making automation timing and priority management more important.
These advances let you build more useful interactions (e.g., lights that guide the vacuum home), but they also expose timing issues and sensor conflicts that weren’t visible in simpler systems. The good news: with a few reliable patterns and tests, you can build automations that behave predictably.
Core problems that cause false triggers and timing conflicts
- Sensor cross-talk: PIR and vibration sensors can interpret the moving vacuum or its motor noise as human activity.
- Event floods and race conditions: Vacuums emit many state changes quickly (zone start, zone end, charging, docked). If your lighting automations trigger on raw events without debouncing, you get flicker or unexpected scenes.
- Overlapping automations: A 'turn off lights after 5 minutes of no motion' rule can conflict with a 'turn on hallway when vacuum moves to dock' routine, especially when both watch the same sensors.
- Assumptions about presence: Automations that only rely on a single motion sensor assume accuracy that PIR sensors don’t always provide — especially against robot vacuums which have low-height profiles.
- Network and cloud latency: Even with Matter, cloud-based events (vacuum reports) may arrive later than local motion triggers, causing ordering problems.
Principles for reliable robot-vacuum + lighting automations
Before diving into recipes, align on a few principles you can reuse across platforms (Home Assistant, Alexa, Google Home, or vendor hubs):
- Favor local rules for timing-critical logic. If a light must respond to a vacuum state change with low latency and predictable timing, run that rule on a local hub or controller.
- Debounce noisy inputs. Require conditions to be stable for a set duration (motion present for 10s, vacuum state unchanged for 5s) before acting.
- Use multi-sensor confirmation. AND together motion, door/window, or pressure sensors to avoid vacuum-caused false positives.
- Isolate automation contexts. Create modes (e.g., Night Mode, Cleaning Mode) that temporarily elevate/deprioritize certain automations.
- Prefer explicit vacuum states over inferred movement. Use the vacuum’s API state (cleaning, returning, docked, paused) rather than trying to infer activity from motion sensors when the vacuum is the actor.
Devices and sensors that reduce false triggers
Not all sensors are equal. Pick sensors and devices that give you the right signal:
- Radar-based occupancy sensors (eg. 60 GHz mmWave) detect humans reliably and ignore small moving objects near floor level like vacuums.
- Multi-axis accelerometers or pressure mats for entrances. A pressure mat on a doorway rarely triggers from a vacuum passing by.
- Door/window contact sensors to confirm entry vs. vacuum movement.
- Robot vacuum state reporting (local API / MQTT / webhooks). Use the vacuum’s own event stream instead of motion blobs when coordinating tasks.
- Smart lamps with local control and brightness presets, which reduce latency and avoid cloud-induced race conditions.
Automation reliability techniques (technical)
1. Debounce and hysteresis
Don’t react to a single event. Require the condition to be true for a short period before actioning, and require a longer period of inactivity to revert. Example:
- Trigger: motion sensor becomes on.
- Condition: motion sensor state remains on for 10 seconds.
- Action: turn the light to 20% brightness (night-friendly).
- Off delay: only turn off if no motion for 5 minutes and vacuum is not performing a docking sequence.
2. Use explicit vacuum states and zone events
Modern vacuums publish states like cleaning, paused, docking, and zone-level messages. Build automations around these states rather than inference.
- Example condition: only run the docking-light sequence when vacuum.state == docking and vacuum.return_reason == finished_zone.
3. Mode-based automation (Cleaning Mode)
Create a household mode called Cleaning that changes sensor priorities and overrides conflicting automations. When Cleaning mode is active:
- Temporarily disable motion-triggered Wake Scenes in zones where the vacuum is running.
- Enable vacuum-specific indicators (soft path lights, dock light flash) that run on the vacuum’s event stream.
4. Use simple OR/AND logic to avoid single-sensor failures
Require two confirmations for an occupancy-triggered light when the vacuum is active:
- Motion sensor AND door contact (someone entering the room)
- OR motion sensor AND presence device tracker shows someone home
5. Prioritize local automations and fallback to cloud
Local automation engines (Home Assistant, local Alexa routines, hub-based rules) execute faster and are less prone to false triggers due to network delays. Keep timing-critical rules local and use cloud only for non-urgent alerts.
Tested automation recipes that work reliably
Below are tested recipes we use in real homes and rental properties. Each recipe includes the core logic, recommended sensors, and a brief testing checklist.
Recipe A — Night-safe vacuum with dim path lights (reliable for occupied homes)
Goal: Vacuum runs at night without waking occupants. If the vacuum needs to dock, a dim path light helps it without turning on bright fixtures.
Requirements:- Vacuum with docking state events
- Hallway smart lamp with dim scene preset (5–15% brightness, warm 2200K)
- Local hub or home automation controller
- When vacuum.state == cleaning AND current_time within night window (22:00–07:00) → enable Cleaning Mode.
- Suppress motion-triggered bright scenes in zones tagged as sleep.
- When vacuum.state transitions to docking, if mode == Cleaning and no human presence detected in hallway (radar sensor or door contact) → set hallway lamp to 10% for 60s, then revert to previous state.
- Simulate vacuum start and docking; confirm hallway only lights at 10%.
- Walk through hallway while vacuum docking to confirm presence overrides and restores normal brightness.
Recipe B — Reliable “vacuum finished” indicator without false flashes
Goal: Flash a soft lamp twice to indicate cleaning is complete, but only when people aren’t moving through the room (avoid false chimes or visual distractions).
Requirements:- Vacuum publishes docked or finished events
- Presence logic (device trackers or radar sensor)
- Trigger: vacuum.state == docked && vacuum.last_action == completed_cleaning
- Condition: no motion in living area for 30s OR presence == away
- Action: run soft flash sequence on lamp: 2 pulses @ 20% brightness, warm tone, 500ms each.
- Complete a small zone clean and watch for the flash only when the living area is empty.
- Verify no flash when people are present or door sensors detect crossing.
Recipe C — Zone-based lighting while vacuum cleans rooms (for rental turnovers)
Goal: Light only the zone the vacuum is cleaning — useful in staged homes or during turnover cleaning in short-term rentals.
Requirements:- Vacuum with reliable zone reports (zone_start/zone_end)
- Lights grouped by room
- Trigger: vacuum event == zone_start with parameter zone_id
- Action: turn on lights.zone[zone_id] to 30% for cleaning (cool white 4000K) with a 1 minute fade.
- When zone_end emits (or vacuum.zone_state == idle for >30s), fade lights off only if no motion for 2 minutes.
- Start single-zone clean and confirm only that zone lights come on.
- Test overlapping zones and verify lights don’t flicker when vacuum crosses thresholds (use a 3s debounce on zone events).
Practical debugging and scene testing workflow
Reliable automations come from iteration. Use this short testing checklist every time you create or update an automation:
- Run in a controlled test: simulate vacuum start/docking and observe lighting responses while recording logs.
- Use logs and traces: Home Assistant Trace or vendor logs show exact timestamps — identify race conditions by checking event order.
- Introduce deliberate delays: add 2–5s delay to the less-critical action to see if ordering fixes the issue.
- Test edge cases: power loss, network outage, multiple vacuums, human presence toggles mid-sequence.
- Gradually relax conditions: start strict (AND conditions) and loosen only after confirming reliability in daily use.
Tip: If your automation behaves fine in testing but breaks under real use, instrument it with lightweight logging — e.g., have the controller post a short state note to an internal file or dashboard. The additional visibility quickly exposes ordering or timing problems.
Advanced strategies for pros and power users
- Event sequencing with queues: Run a small queue system on your local hub. Rather than firing lights immediately on events, push events into a queue and process them sequentially with priority rules (e.g., safety > housekeeping > ambiance).
- Matter scenes and device groups: Use Matter scenes to set pre-defined lamp states in a single atomic call, reducing partial updates and flicker.
- MQTT + retained state: If you bridge your vacuum via MQTT, publish retained states for vacuum events so automations can read the last-known state after hub restarts.
- Edge AI motion filtering: Use devices that provide human/animal classification or filtering so small moving objects (vacuums, pets) are ignored.
What’s changing next — 2026+ predictions
Expect these trends through 2026 and beyond, which will make integration both easier and more nuanced:
- More vacuums with local webhooks and MQTT — deeper local integrations will reduce latency but demand better local automation discipline.
- Smarter presence sensors with multi-modal detection (radar + thermal) that can reliably ignore robotic devices.
- Automation marketplaces and sharable recipes — as hubs mature, you’ll import vetted cleaning + lighting recipes that already include debounce and mode logic.
- Standardized event fields for vacuums (expected as part of industry-led schemas) that make mapping events to automations uniform across brands.
Quick reference: Do’s and Don’ts
- Do use vacuum.state events for logic whenever possible.
- Do debounce motion inputs and require 2 confirmations if a vacuum is active.
- Do prefer local automations for timing-critical tasks.
- Don’t rely on a single PIR in high-traffic or vacuum-cleaning zones.
- Don’t let bright wake scenes run during scheduled night cleans — use dim, warm path lighting instead.
Final checklist before you go live
- Confirm vacuum publishes the events you plan to use (test via API or hub logs).
- Set up a Cleaning Mode that can be toggled manually and by schedule.
- Debounce motion inputs for 5–15s depending on sensor type.
- Ensure lights use scene presets to avoid partial updates and flicker.
- Run through the test suite: normal run, interrupted run, overlapping automations, and presence overrides.
Wrap-up: make your automations trustworthy
False triggers and timing conflicts are fixable with predictable patterns: rely on explicit vacuum states, add debounce and multi-sensor confirmation, and keep timing-critical logic local. In 2026 the hardware and protocols have matured — use that to your advantage by building automations that are both intelligent and respectful of the people in the home.
Ready-made help: If you want tested automation templates for Home Assistant, Alexa, or Google Home — or curated smart lamps and sensors that play nicely with popular robot vacuums — we’ve assembled a starter kit and step-by-step recipes you can import. Try the templates in a demo environment, or reach out for a one-on-one setup walkthrough.
Call to action
Get our free downloadable automation templates and a checklist for vetting sensors and vacuums in your home. Click to download the kit or contact our integration experts for a tailored setup — and never wake the house again.
Related Reading
- From Stage to Open House: Hybrid Home Showings in 2026 — Production, Tech, and Safety
- Weekend Capsule Wardrobe for Travelers: 10 Investment Pieces to Buy Before Prices Rise
- How Creators Can Use Bluesky’s Cashtags to Build Investor-Focused Communities
- The Ethics of Beauty Tech Marketing: Lessons from CES and Placebo Product Hype
- Building a Paying Fanbase: 10 Exclusive Content Ideas Jazz Artists Can Put Behind a Paywall


